Using the Upload Files window
In brief
The Upload Files window is where you can upload files from your computer to Exaprojects. There are many places that this can happen - from uploading directly to a project folder to adding attachments to a task comment. Dependent on the type of upload, there are a range of features available to you. You may also be required to provide additional information along with your uploaded files.
Uploading to Exaprojects is a two-stage process. To begin with, you add your files to the 'Upload Files' window, which acts as staging area for your files. Your files will appear in a table from which they can be renamed and additional information provided as required. It's important to note, however, that your files aren't actually uploaded at this point. Once you're happy and the files have passed the relevant checks, you can then proceed and upload your files. An upload tracking window will then appear - only after this window reports the file uploads as finished will your files have been uploaded to Exaprojects.
Adding files#
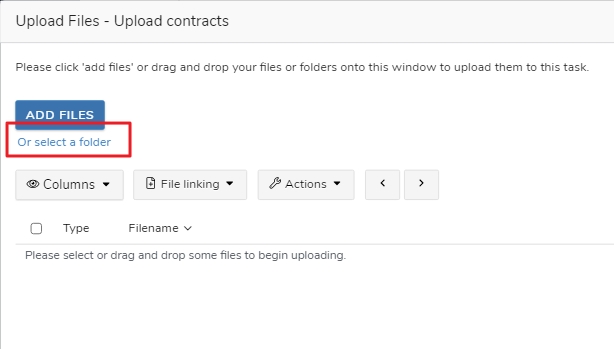
To add files to the 'Upload Files' window, you can click the blue 'Add Files' button and select files from your computer. Note that you can select and upload multiple files at once.
You can also drag and drop files directly onto the upload window.
Furthermore, to save you from individually selecting an entire folder's worth of files, you can upload the folder itself using the 'Or select a folder' link beneath the 'Add files' button.
Be aware that this will not add any files nested in subfolders - only the files directly beneath the folder you select will be uploaded.
Upload window buttons#
Dependent on your upload type, there will be several buttons above the upload files table. In left to right order, they are:
'Columns' - hide, show and reset columns here. See here for more information on using Exaprojects' tables.
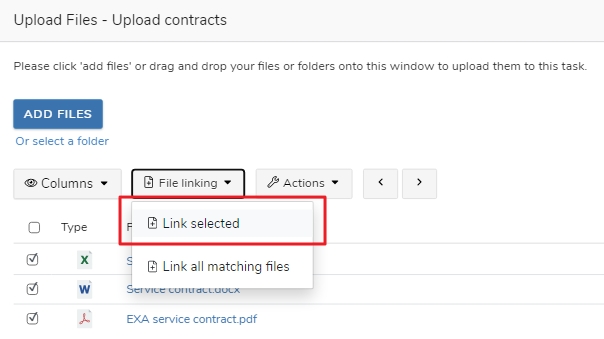
'File linking' - this button will only be present when uploading to Upload tasks, My Available Files or Project Files as it allows you to ensure files are linked prior to upload. Although files with matching filenames will be automatically linked on upload, you can use this button's dropdown menu to unlink files ('Unlink all linked files'), or individually link files by checking the checkboxes, then selecting 'Link selected'.
'Actions' - Dependent on your upload type, there may be several menu options here.

- 'Import spreadsheet' - if you're uploading a large number of files, you may prefer to add descriptions for them offline. In this case, you can add all the files to the 'Upload Files' window, then click 'Import spreadsheet'. You'll then be prompted to download a spreadsheet consisting of the filenames of the files currently in the 'Upload Files' window. In that spreadsheet, you can then add the file descriptions to the Description column. Once finished, reupload the spreadsheet by selecting the 'Choose File' button. Exaprojects will then automatically populate the file descriptions.
- 'Auto-rename all' - if you are required to rename your files in accordance with a file naming convention, this button can automatically try to rename your files based on their existing filenames.
- 'Set all filenames as descriptions' - in some cases, you may wish to set a file's name as its description. This can be useful, for example, if you are forced to rename the file as part of the file naming convention but you wish to save the original filename as the description as it contains useful information.
- 'Restore all original filenames' - if you have renamed files, or used the 'Auto-rename all' feature, this can restore files' original filenames.
- 'Export spreadsheet of all' - this will export all the current files and their descriptions. This is useful if you wish to make offline update to file descriptions and then reimport them via the 'Import spreadsheet' feature.
- 'Remove all' - this will remove all files from the table.
Note that, if you select multiple files in the uploads table using the checkboxes then click the 'Actions' button, you'll be able to perform the actions on the selected files only.
Right & left chevrons - if there are issues with your uploaded files (e.g. you haven't edited every filename in accordance with the file naming convention, you can use these arrows to toggle through which cells in the upload table have errors and need to be addressed.
Table features#
Right clicking a cell#
Right clicking a cell will bring up a menu with actions available for that column. In the below example, a 'Description' column cell has been right clicked, however, the same principles apply for all columns.
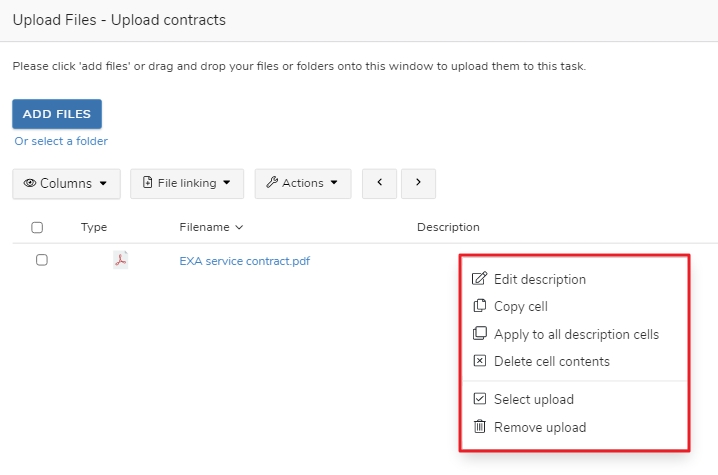
- 'Edit description' - this will open a text editor to allow you to edit the description
- 'Copy cell' - this allows you to copy the data from the cell, such that it can be copied into another 'Description' cell. Once you have copied data, the 'Paste' option will appear when you right click another 'Description' cell. Please note that data can only be copied and pasted between cells of the same type, except if you are copying from 'Filename' to 'Description' or vice versa, in which case pasting between both is permitted.
- 'Apply to all description cells' - this will take the current description and update the 'Description' cells of all other files in the table with it. This is particularly useful with attributes as you might need the same attributes for every file you're uploading. Rather than having to reapply the attributes for each file, you can simply do it for one file, then use this feature to copy them to the all the other files.
- 'Delete cell contents' - as the name suggests, this will clear the contents of a cell.
- 'Select upload' - check this file's checkbox such that the file can be included in any multi actions from the Actions button menu.
- 'Remove upload' - delete the upload from the table.
Good to know
If you've accidentally added the incorrect data to a number of cells, a quick way to clear them all is to 'Delete cell contents' of one cell, then use 'Apply to all type cells' to copy the empty cell to the others.
Vertical dragging#
In a similar fashion to Excel, you can vertically drag cells in order to populate the same cells of other files. To do this, select your desired cell, and look for the blue square in the bottom right corner of the cell.
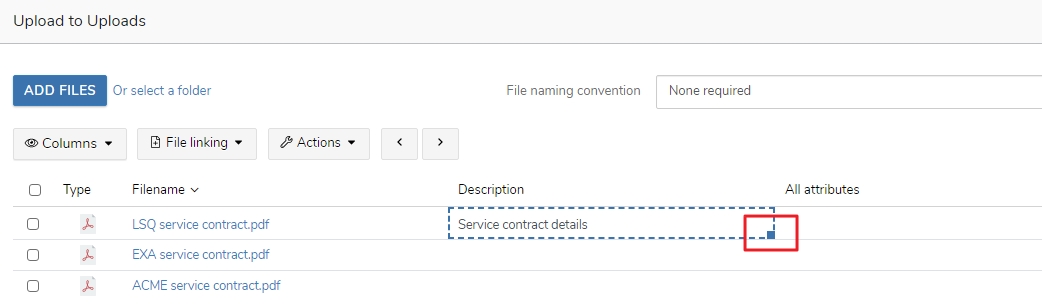
If you then click the blue box, hold and drag downwards or upwards, you'll be prompted to confirm your choice. If you select 'Fill cells vertically', the cells you have dragged onto will have the selected data populated.
Good to know
All cells can be vertically dragged. This is particularly useful when applying the same attributes to a number of files.
Horizontal dragging#
You can drag the 'Filename' cell horizontally across to the 'Description' cell. You can combine this with a vertical drag to quickly set filenames as descriptions.
Table data#
Required cells#
In many situations you will be required by your project administrator or task assigner to rename your files or provide additional information concerning them. As you'll see below, what data you need to provide is really obvious thanks to the red border around required cells. Once you have added your data and satisfied the requirements for a cell, the red border will disappear.
Filename#
If there is a red border around the 'Filename' column cells, this indicates there is a file naming convention present which you will need to complete. To do so, either double click the cell, or right click the cell and select 'Complete file naming convention'. A new window will then appear in which you can complete the file naming convention - please view this guide for a complete description on how to do this.
Description#
A red border around the 'Description' column cells indicates that you need to provide a description for your files. Simply right click your cell, select 'Edit description', add your description and then click 'Update' to do so.
Good to know
You can use any of the text editing features available in the 'Edit description' window, such as bold, underline, bullet points, etc. to format your description. Whilst the description wont show as formatted in the 'Upload Files' table, it will be when the description is viewed within the 'Project Files' area.
Attributes#
For a detailed description of attributes, please see this help file. In the below example, we're going to assume there's two attributes that require completion - Location and Department.

As you can see, the individual attributes are included as their own columns. You'll also note there is an 'All attributes' column. This is simply an aggregate of all the other attributes. This column is included because if you have a large number of attributes to add per file, it's often easier to just add them in one go - as opposed to adding them per column. Note that you won't need to add data to the individual attribute columns as well as the 'All attributes' column - updating one will update the other.
If you right click and select 'Edit attribute', or double click the cell, a new window will open in which you can select
In the below video, we'll show how adding attributes to the individual columns works.
In the next video, we'll show how to use the 'All attributes' column.
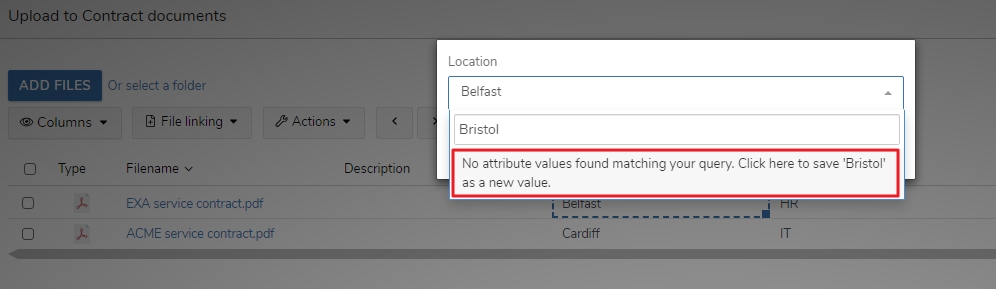
Finally, in certain situations, you may be allowed to add new values to the attribute. You'll know this because Exaprojects will offer to save the new value for you when you type it.
Good to know
Don't forget to use the 'Apply to all attribute cells' (available on right clicking of an attribute cell) to quickly apply the same attributes to every file.
Tags#
For a detailed description of tags, please see this help file. The process to add required tags is very similar to attributes. Simply right click the 'Tags' cell and click 'Edit tags'. Dependent on the task or folder configuration, you can then either select from a list of specific tags, or be allowed to select any tag on the project.
Optional cells#
In certain situations (particularly when uploading to folders in Project Files) you can optionally add additional data. If this is the case, the relevant columns will be present, but it's entirely up to you whether you update them. If you do wish to, it's the exact same process as described above, just double click the cell or right click and select 'Edit'.
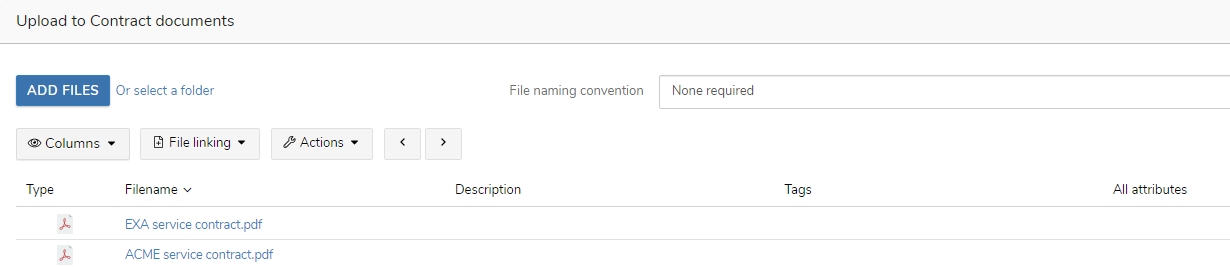
As an example, in the below screenshot, taken from a Project Files upload, we have the 'Description', 'Tags' and 'All attributes' columns present. As a result, any one of those columns can have their data updated.
Read-only cell data#
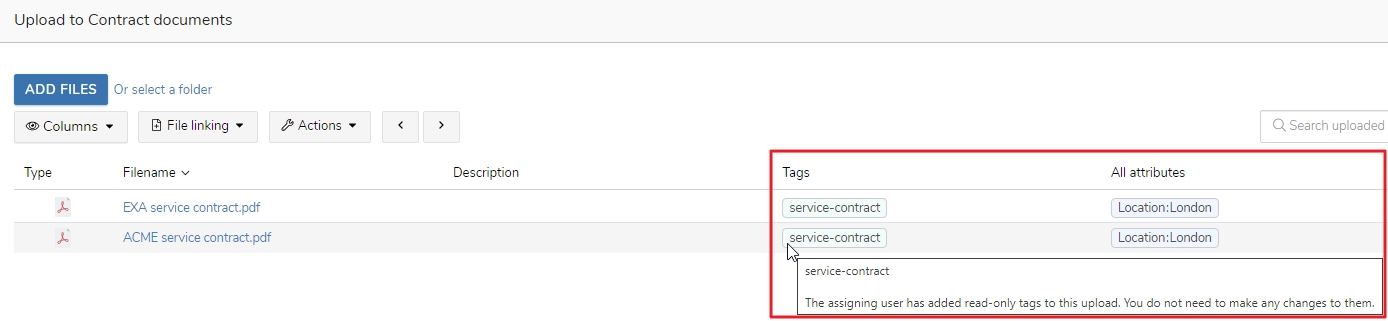
Lastly, there may be occasions where data has been pre-added to a cell. As an example, the assigner of an Upload task might already know that the file will have a Location attribute of 'London' and a tag of 'service-contract'. To save the uploader time as well as avoid any potential confusion, they can pre-add both the attribute and the tag. They will then appear in their respective columns, but you don't need to make any updates to them. To check if a tag or attribute is read-only, you can hover over the column.
Overwriting or revising existing files#
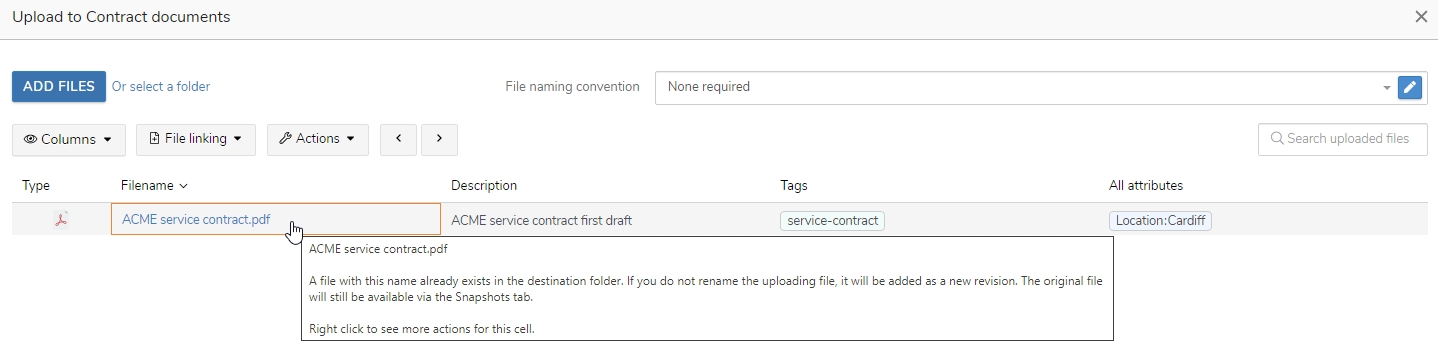
In many cases, overwriting an existing file will be necessary. For example, you may be uploading a new revision of a file. If this is the case and there is an existing file present, when you upload the new file, the 'Filename' column will have an orange border around it. This indicates that a file with the same name already exists. You can hover over the cell for more information.
Furthermore, if the existing file you are revising has a description, attributes or tags, these will be automatically loaded into the 'Upload Files' table if applicable. If necessary, you can then make the necessary updates to those fields to reflect your new revision.
Note that, if you do overwrite a file, Exaprojects will warn you before you upload to confirm it's the correct course of action. You'll see a prompt like the below:
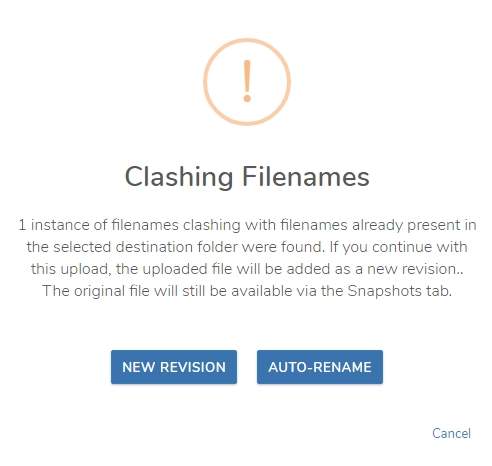
If you do want the uploading file to be added as a new revision of the existing file, just click 'New revision'. Alternatively, if you don't want to add a new revision and want the uploading file to be a completely new file, you can click 'Auto-rename'. Exaprojects will then automatically rename your file by appending a number in brackets to it. I.e. 'Acme service contract (1).pdf'. You can also click the cancel button and manually rename any clashing filenames.
Good to know
You can recover previous file revisions via the 'Snapshots' tab in Project Files.
Submitting and monitoring uploads#
Once you're happy with your uploads and you've completed any required fields, you can click the blue 'Upload files' button in the bottom right of the window. Once clicked, you'll notice an 'Upload progress' window appears in the bottom right of your screen. You can then use this to keep track of your uploads and cancel them if necessary.
Please be aware that you can't leave the current page whilst files are uploading. If you do wish to browse to a new page, opening a new tab and doing so would be best.
Good to know
You can upload multiple files to multiple folders at once. You do not need to wait for uploads to one folder to finish before uploading to another folder.